Abert Einstein said, "A person who never made a mistake never tried anything new.” He had no idea that no words could better describe the rationale behind the wireframing process. Each iteration of wireframes allows designers to learn from their mistakes and produce better, more human-oriented versions.
Wireframing is an essential part of the product development process. They come in handy when you need to brainstorm ideas, pitch them to stakeholders, or test them with users. Underestimating wireframing or considering it an unnecessary step of the design process can cost your company a lot of resources. Before implementing a final product with redundant functionality or features that fail to meet users' needs and expectations, try wireframing.
But first, let's define the value of wireframes, their types, and wireframing tools that can help you create wireframes without much effort.
What is a wireframe?
A wireframe is a simplified black-and-white version of a final product. Wireframes work as a bridge between developers, designers, project managers, and clients. They ensure everyone is on the same page while discussing the overall structure and functionality of the future product.
Wireframes define the dimensions and placement of page elements, information architecture, intended behaviors, and navigation for your website. Usually, they're stripped of any decorative elements like logos, visuals, fonts, and colors that could distract team members at this point of the product discussion.
Taking the Intro to Wireframing lesson will help you better understand why UX designers use wireframes in their workflow.
Types of wireframes
Wireframes range from low to high levels of fidelity. Fidelity in the design context refers to the level of detail and functionality. Each kind of wireframe can be helpful to different software design and development teams. The type you use depends on the needs of a given project and your progress in the design process.
What are low-fidelity (lo-fi) wireframes?
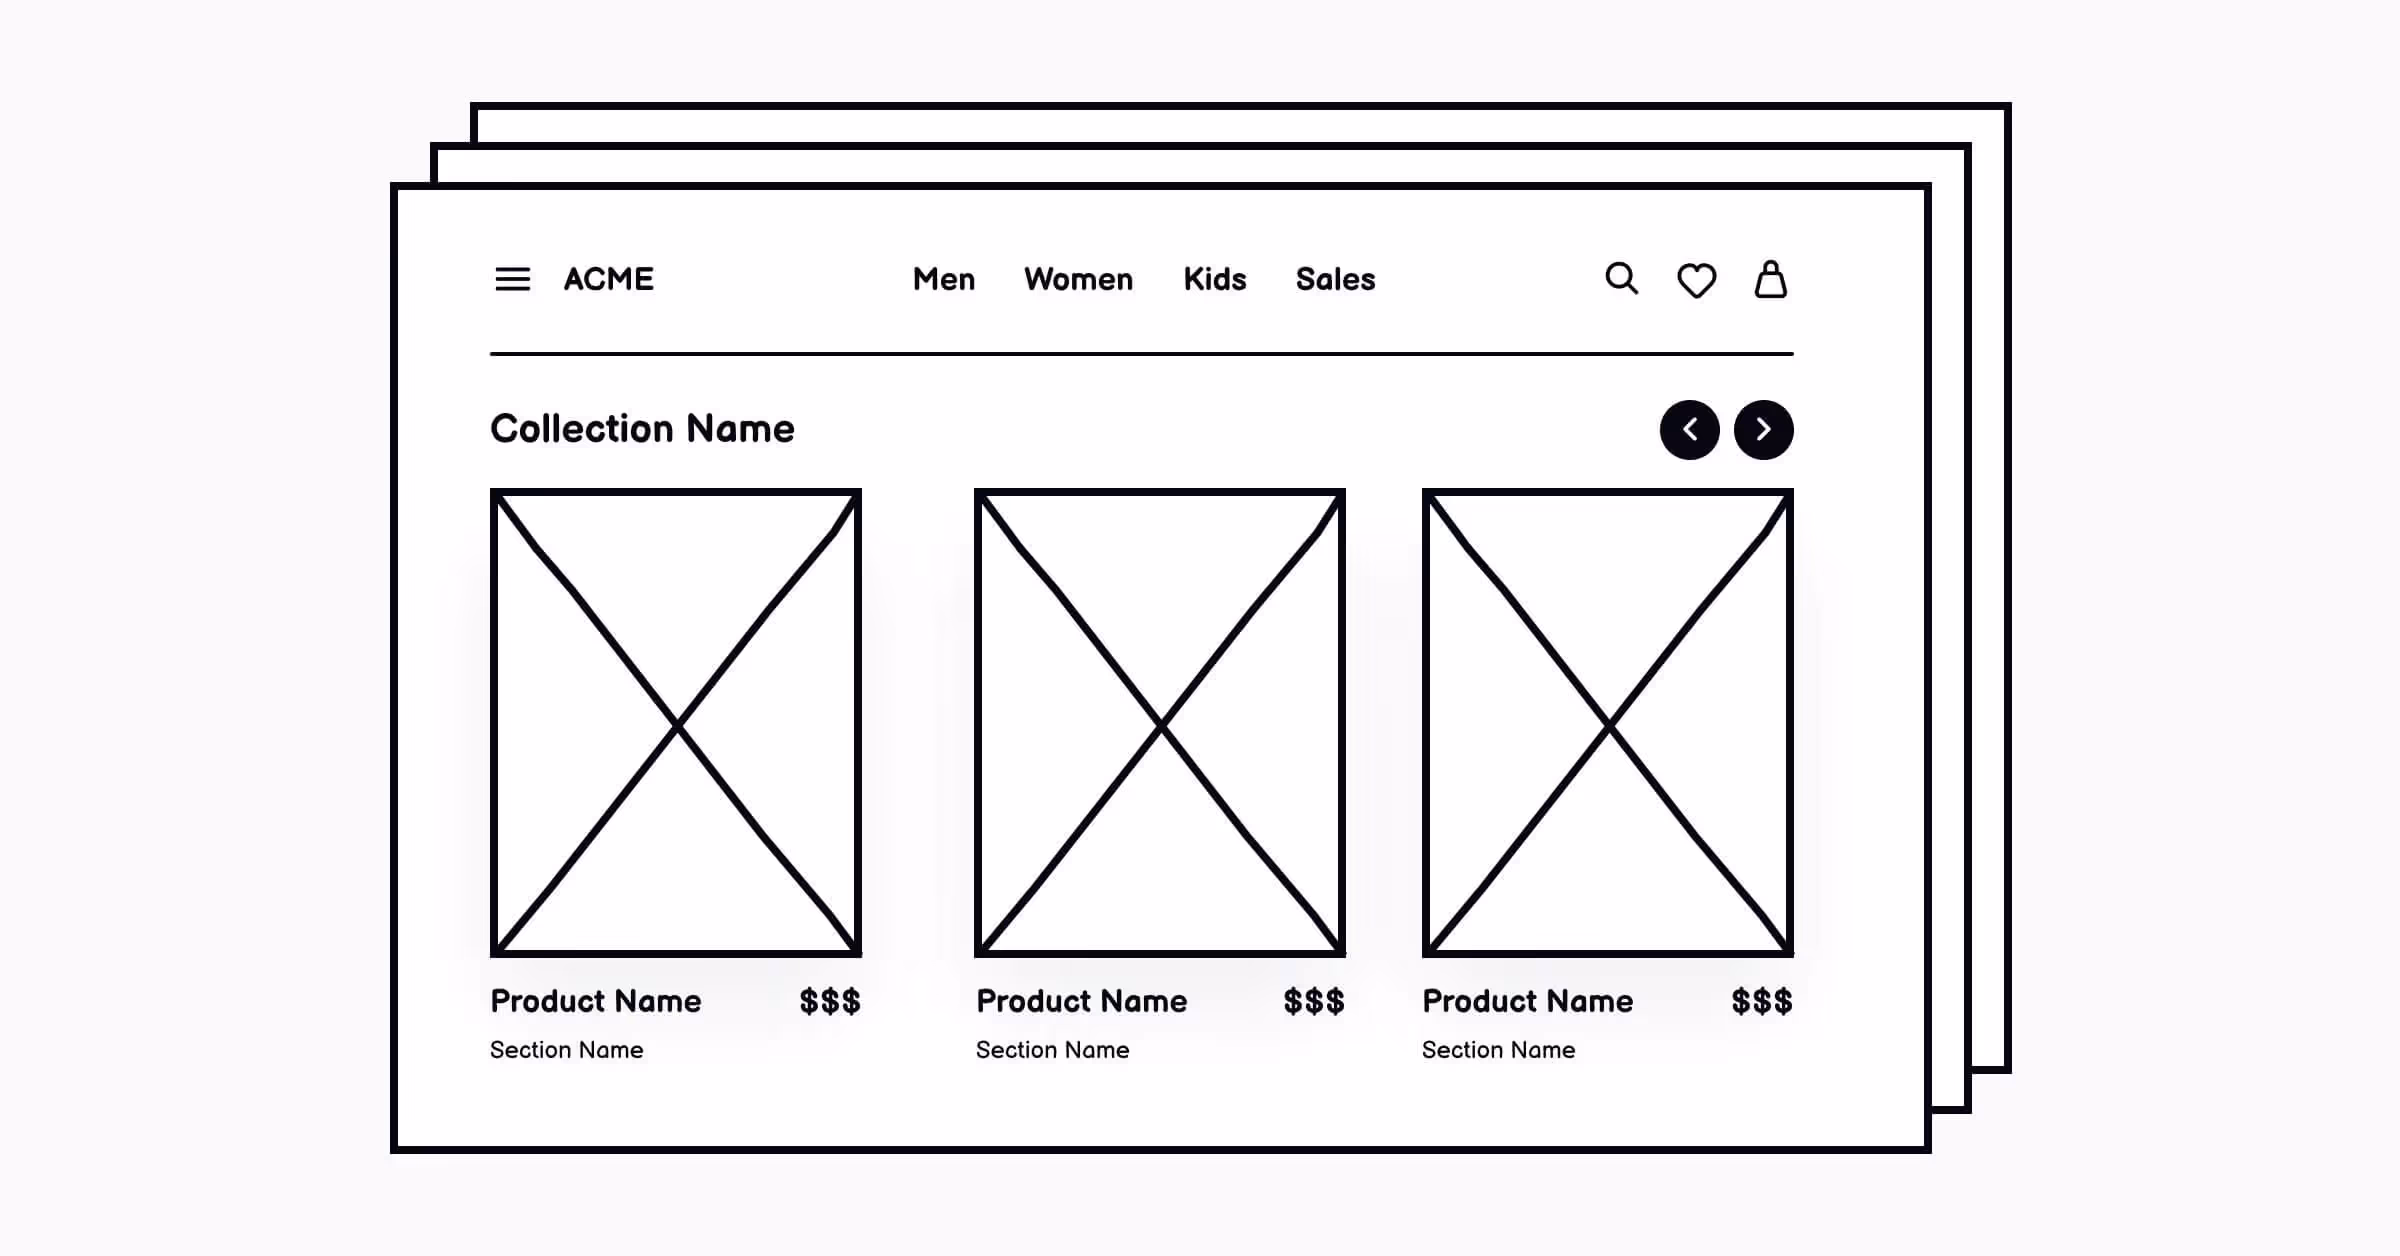
Low-fidelity wireframes act as the rough draft of the product. It's not the final product but a place to start. Low-fidelity wireframes are usually black and white and not interactive. They show UI elements like boxes and lines without detailed annotations. Their purpose is to help shape the product in the early stages of development, communicate a general project vision, and ensure user and business needs are met before further product implementation. Low-fidelity wireframes don't take much work, but they'll spare your team a lot of extra effort down the road.
What are medium-fidelity wireframes?
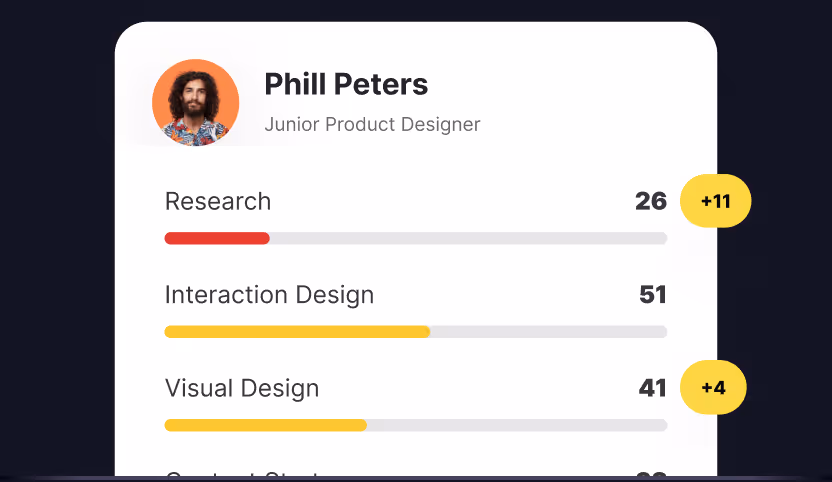
Medium-fidelity wireframes are essentially low-fidelity wireframes with more detail. For example, they might have real copy instead of placeholder text, be in grayscale or even contain some colors instead of a monochrome palette to emphasize certain content and better convey visual hierarchy.
What are high-fidelity (hi-fi) wireframes?
High-fidelity wireframes represent a final form and aesthetics. So, they usually use the final color palette, texts, and imagery. Notice that a high-fidelity wireframe and a high-fidelity prototype aren't the same. Wireframes and prototypes are used at different stages of the design process and have different goals. Wireframes stay static, and their purpose is to convey the structure of the page. Wireframes require less effort to create and, thus, are better suited to test ideas. Prototypes are usually showing interactive features and often function just as a final product will. Their goal is to show UI element interactions, style, and positioning. Prototypes are helpful for validating usability and the overall value of a solution.
Problems are everywhere
I enjoy solving problems and consider it a hobby of mine. I love when people look at my work to aid in the completion of their tasks.. But I find it difficult to create ideas on a computer device. When I want to solve a particular issue I take a pen and a paper and start drawing out a solution. I first start with the interaction of the user and then chart, from start to finish, an application. That process helps me to understand how the user gets to their end goal.
We start by brainstorming ideas for solving the problem at hand. In the initial stage, we might have different ideas about how to approach the problem and how to create the solution. But I use graphic flow-charts to achieve consensus about how the focus groups can achieve their goal. Let's dive into how I start solving problems using only a pen and paper.
Why are wireframes important & how you incorporate them into the UX design process
Many teams underestimate wireframes and consider this phase a waste of time. During the wireframing stage, noticing redundant features and usability issues is much more cost-effective. This is not so easy during the design phase, as any revisions will cost you more time and money. That's why it's crucial to persuade stakeholders that your project needs wireframing. Here's a list of arguments you can use to persuade everyone that your project needs time for wireframing:
- Wireframes help map out a general outline of a product or feature. In the very early stages, use paper sketches to brainstorm, gather feedback, and iterate.
- Wireframes keep everyone focused. Before visual design and content are in the picture, your team doesn't get distracted by discussions of colors, images, and typography. Instead, everyone focuses on the navigation layout and page structure.
- Wireframes are cost-effective. Once you get the first feedback, you can easily toss away the first drafts and improve ideas for subsequent testing iterations.
- Wireframes encourage collaboration and bring all team members on board with product development. They also help you know your stakeholders or clients better, understand their goals and behaviors, and be more prepared for the next iterations.
- Wireframes help prioritize content. Moving around interface elements allows UX designers to see how much space they take and rearrange them in order to guide users' eyes toward the most important content.
- Wireframes help collect user feedback and assess whether a product or feature solves their problem or if the problem exists in the first place.
Creating a Wireframe to Solve Problems
Step 1: Create user flows
Before UX designers start planning how each screen will look, they gather user research data, analyze it, and start considering user flows. A user flow shows the steps users take to complete a task and achieve a specific goal. Mapping it out will help you understand what functionality you need to include in wireframes and how they should be connected. User flows aren't always linear because users might take different paths to achieve the same goal. Considering different approaches will help you make sure you don't miss any screens.
Step 2: Define the main Screens
Based on user flows and user needs, define the main screens to guide users to their goals. Don't rush into wireframing with digital tools. Instead, take a pen a paper and unleash your creative process. Don't worry about the quality — you need those first drafts to explore different approaches from different angles.
This is the stage when you want to generate as many ideas as possible and not worry about the quality. However, avoid jumping into prototyping right away. It requires more effort and doesn't allow you to explore many approaches quickly. Design several versions of each screen, get feedback, and iterate upon them until you have a couple of working ideas.
When creating sketches, always keep users' goals in mind. For every design screen, ask yourself:
- What's the purpose of this page?
- How does this page help users achieve their goals?
Step 3: Select the frame
Once you're done sketching, you can transfer your ideas to a digital canvas. Depending on the type of product you're designing, select the frame to work on:
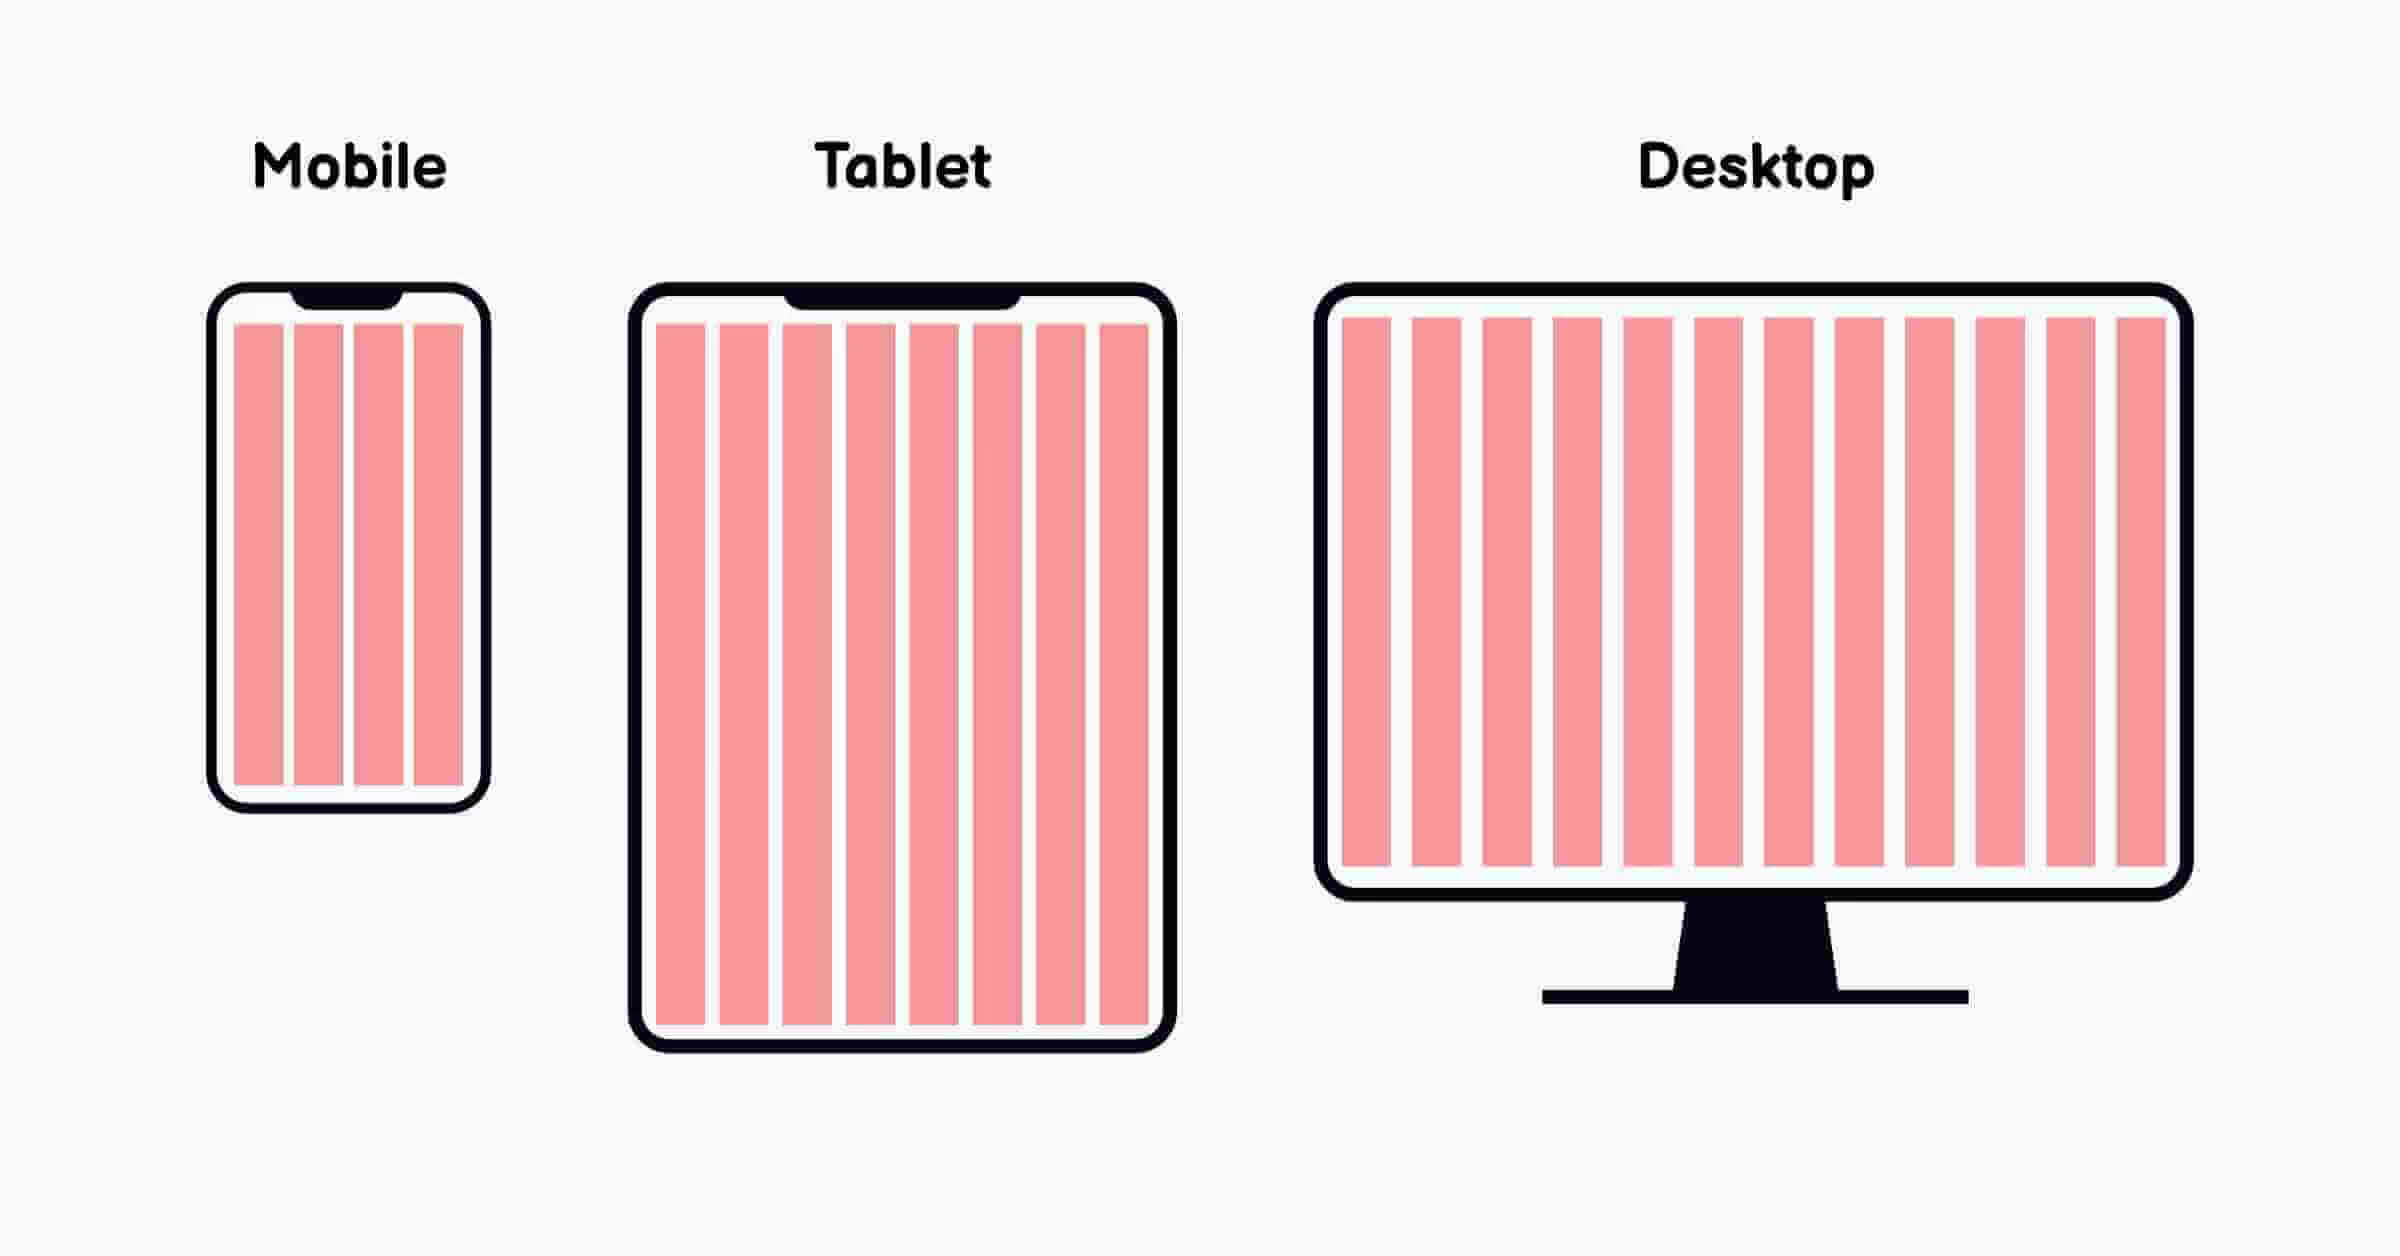
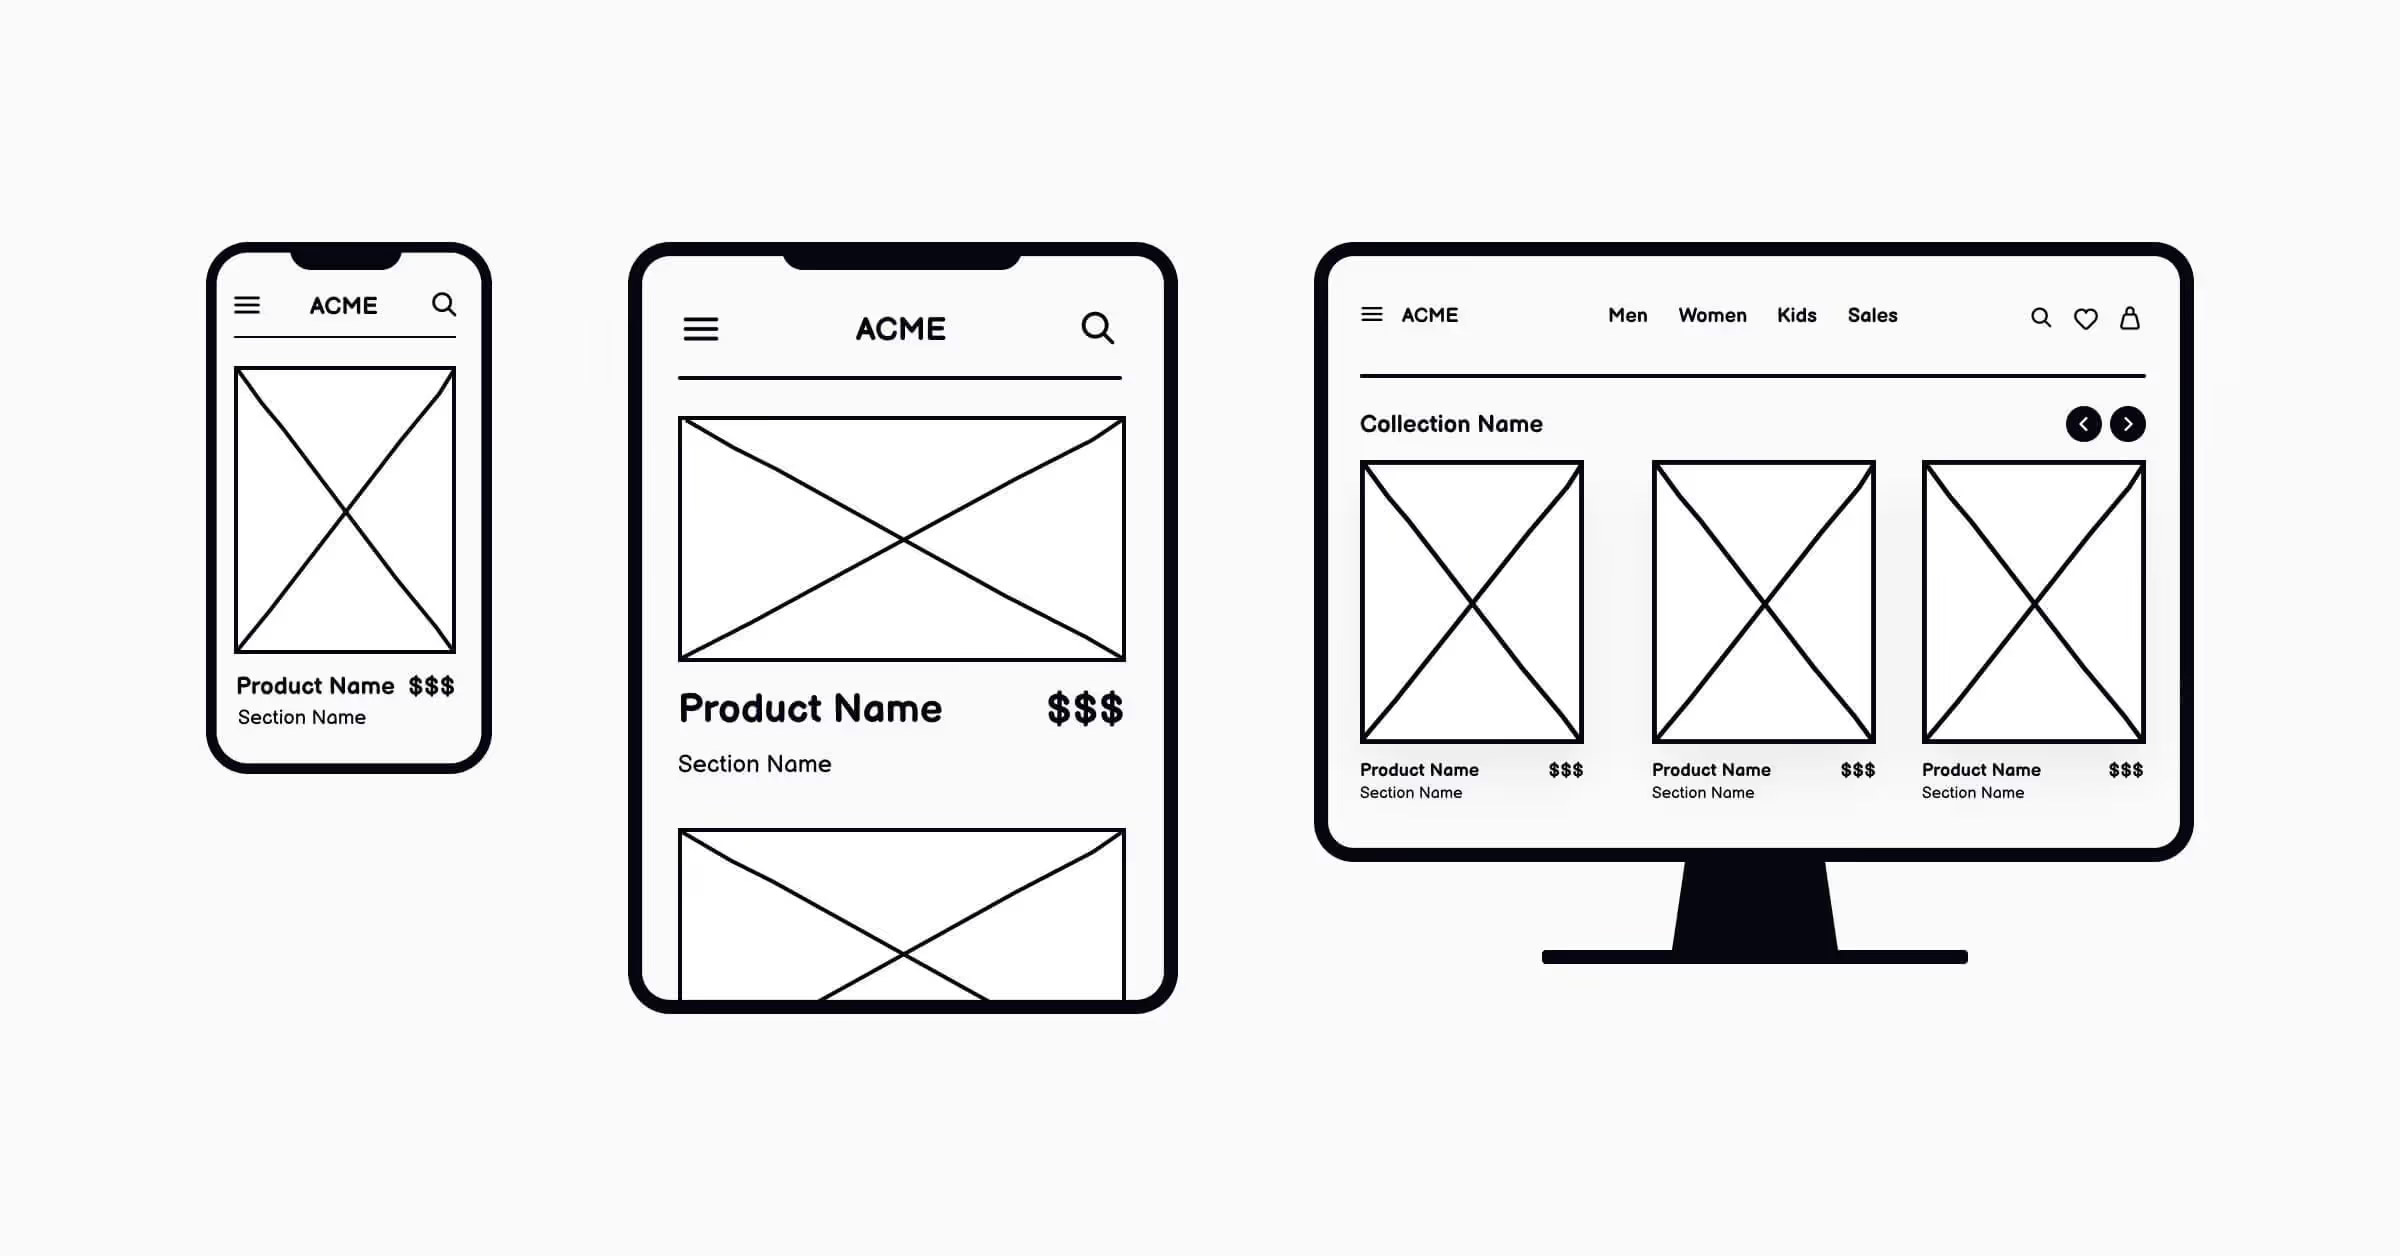
- For web wireframes, the most common browser sizes are 1024x768 pixels and 1920x1080 pixels.
- For mobile, the frame dimensions depend on each specific device. Start by finding out what screen size is most popular among your target users and use it for your wireframes.
💡Pro tip: Take a mobile-first approach and create wireframes for smaller screens first. It provides better consistency across devices.
Step 4: Determine the layout
At this stage, you use simple blocks to outline the structure and layout of a future user interface. Your goal is to establish a clear hierarchy and guide user attention to the most vital information first. Start with the navigation and search functionality, then move to the body (text and images), and finish with the remaining details (selection controls, inputs, progress bars, and dialogs).
Step 5: Rely on design patterns
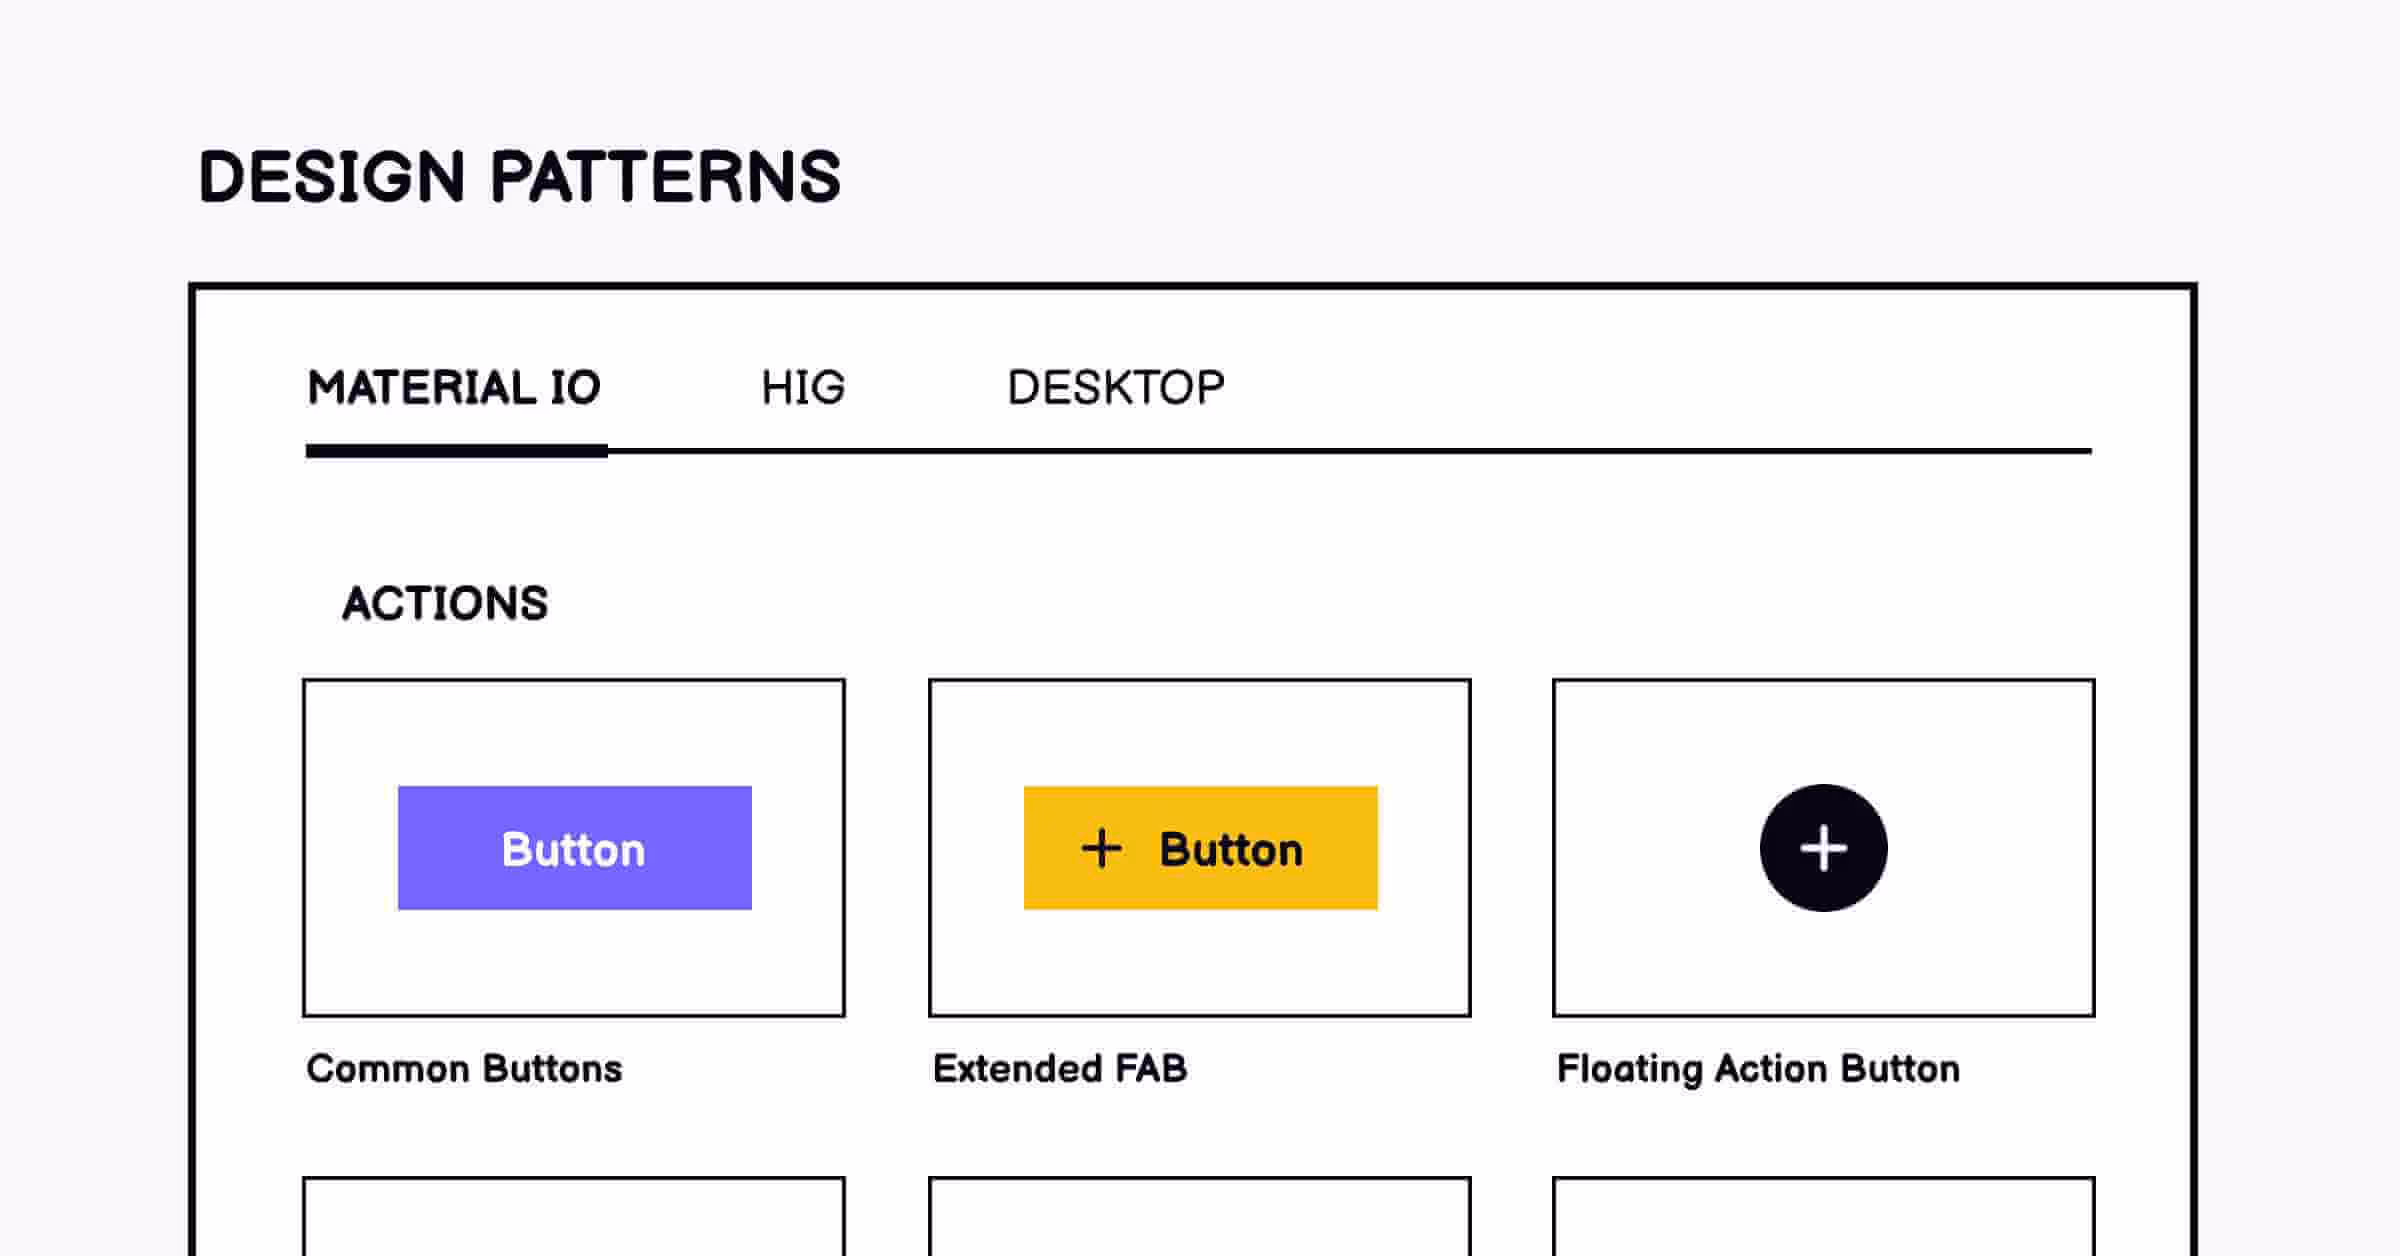
Familiarity and consistency of user interfaces are the most important properties of effective UX design. As users open a new website or application, they assume things will look, operate, and be located in a certain way based on their prior knowledge. When wireframing for mobile, consider the design patterns associated with a specific operating system, iOS or Android.
Step 6: Bring in actual copy
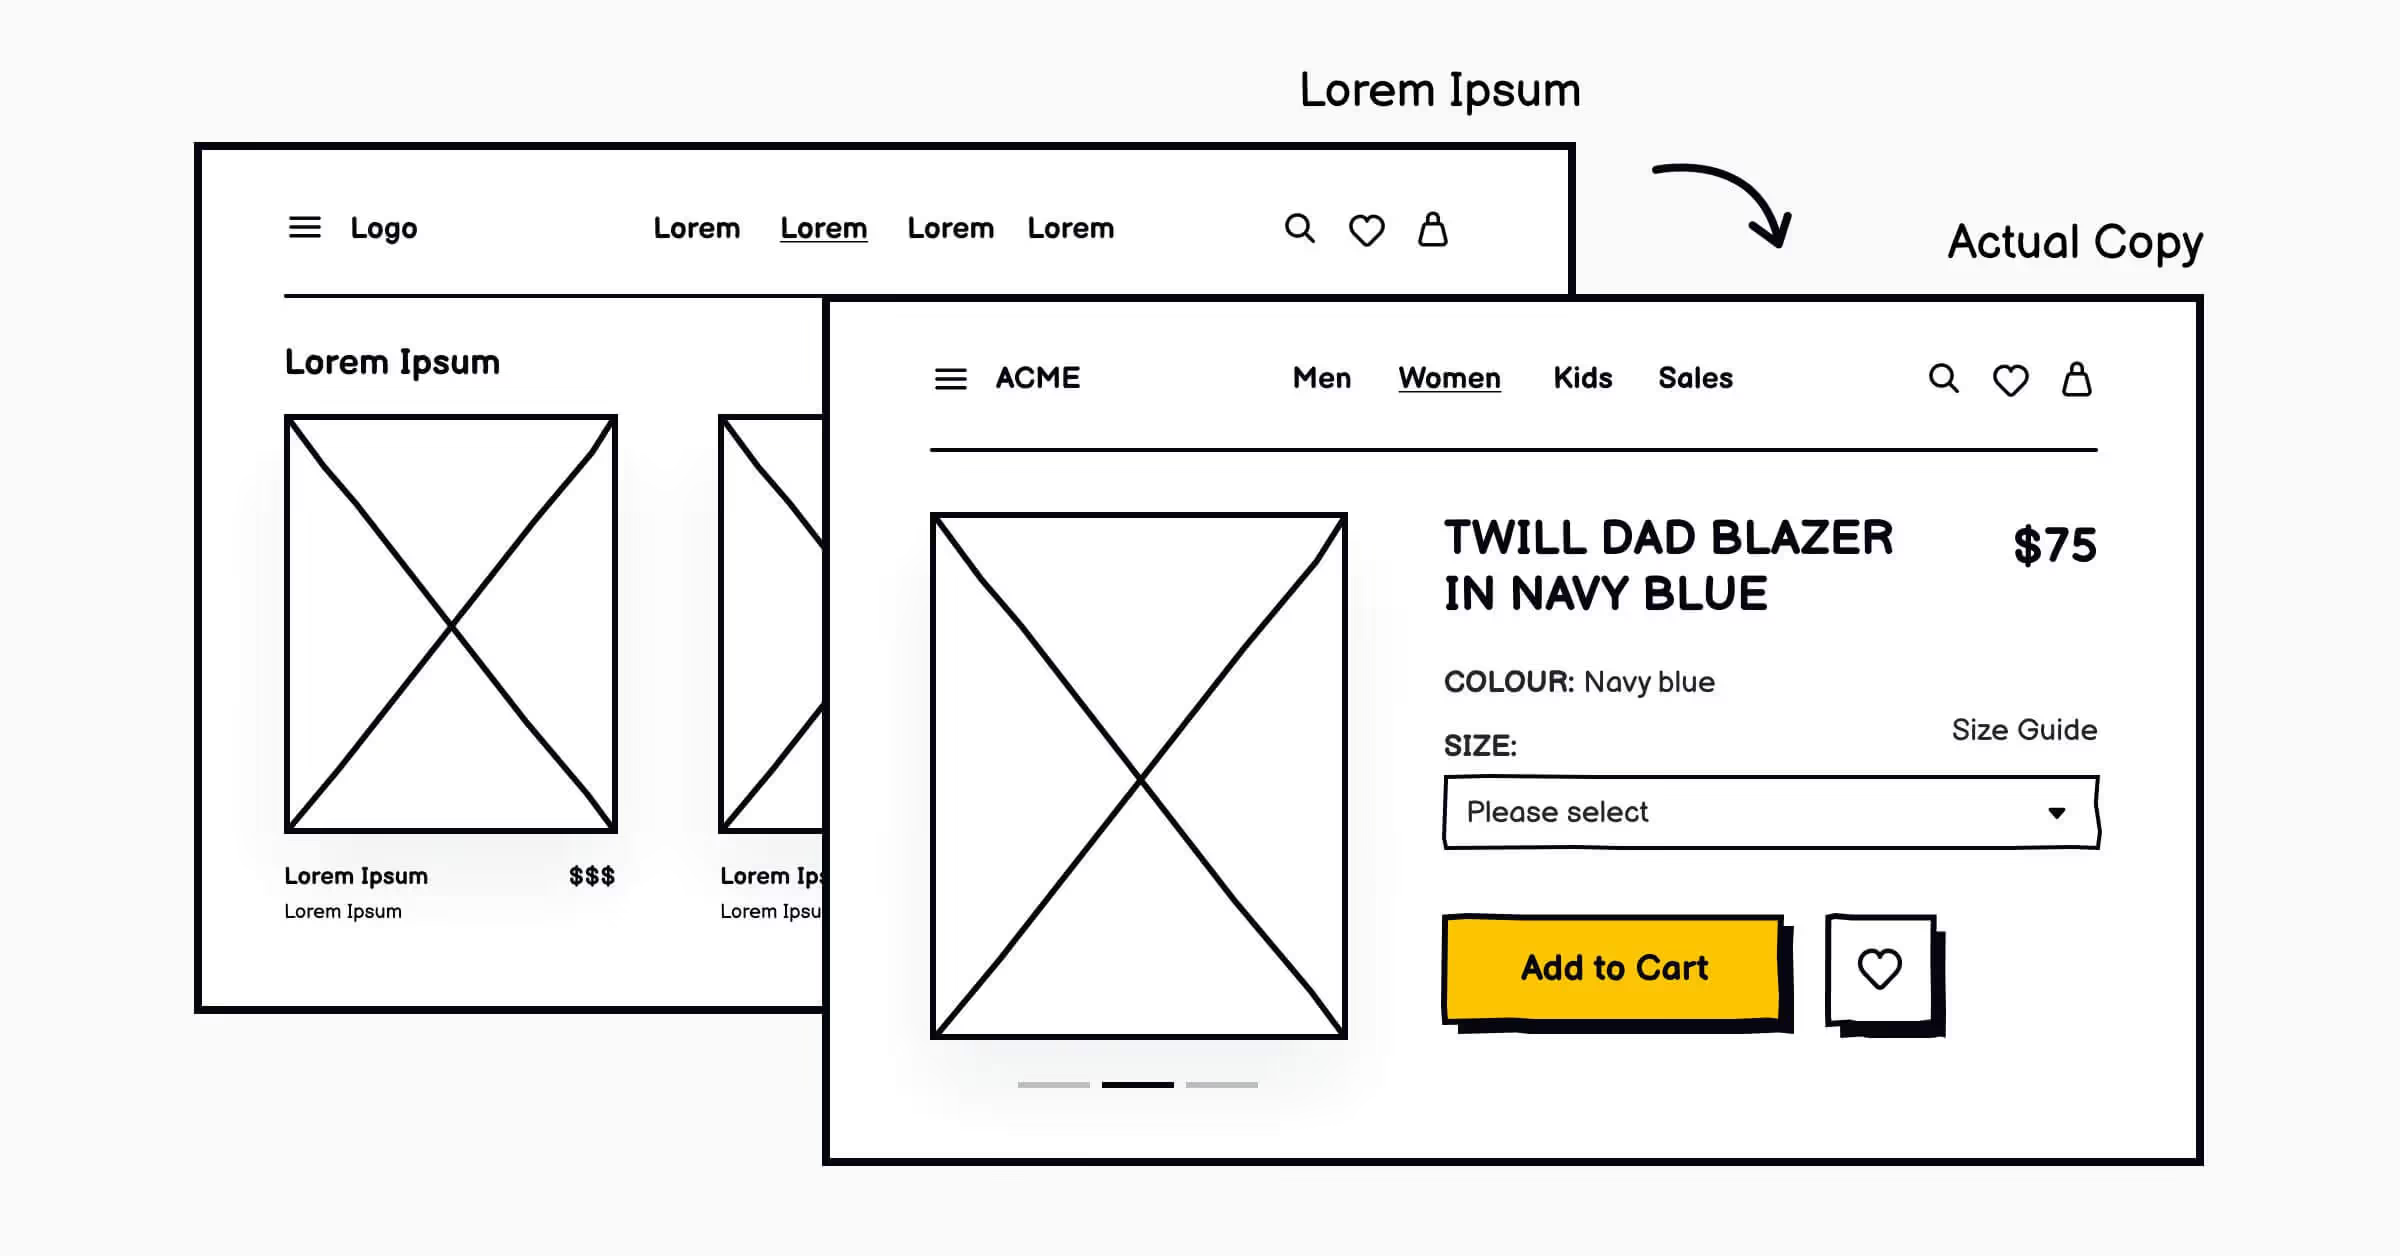
It's essential to bring in actual copy as soon as you've established a visual hierarchy. Replacing image placeholders and lorem ipsum with actual content will help:
- Evaluate if the layout and information architecture works
- Keep stakeholders focused when discussing functionality
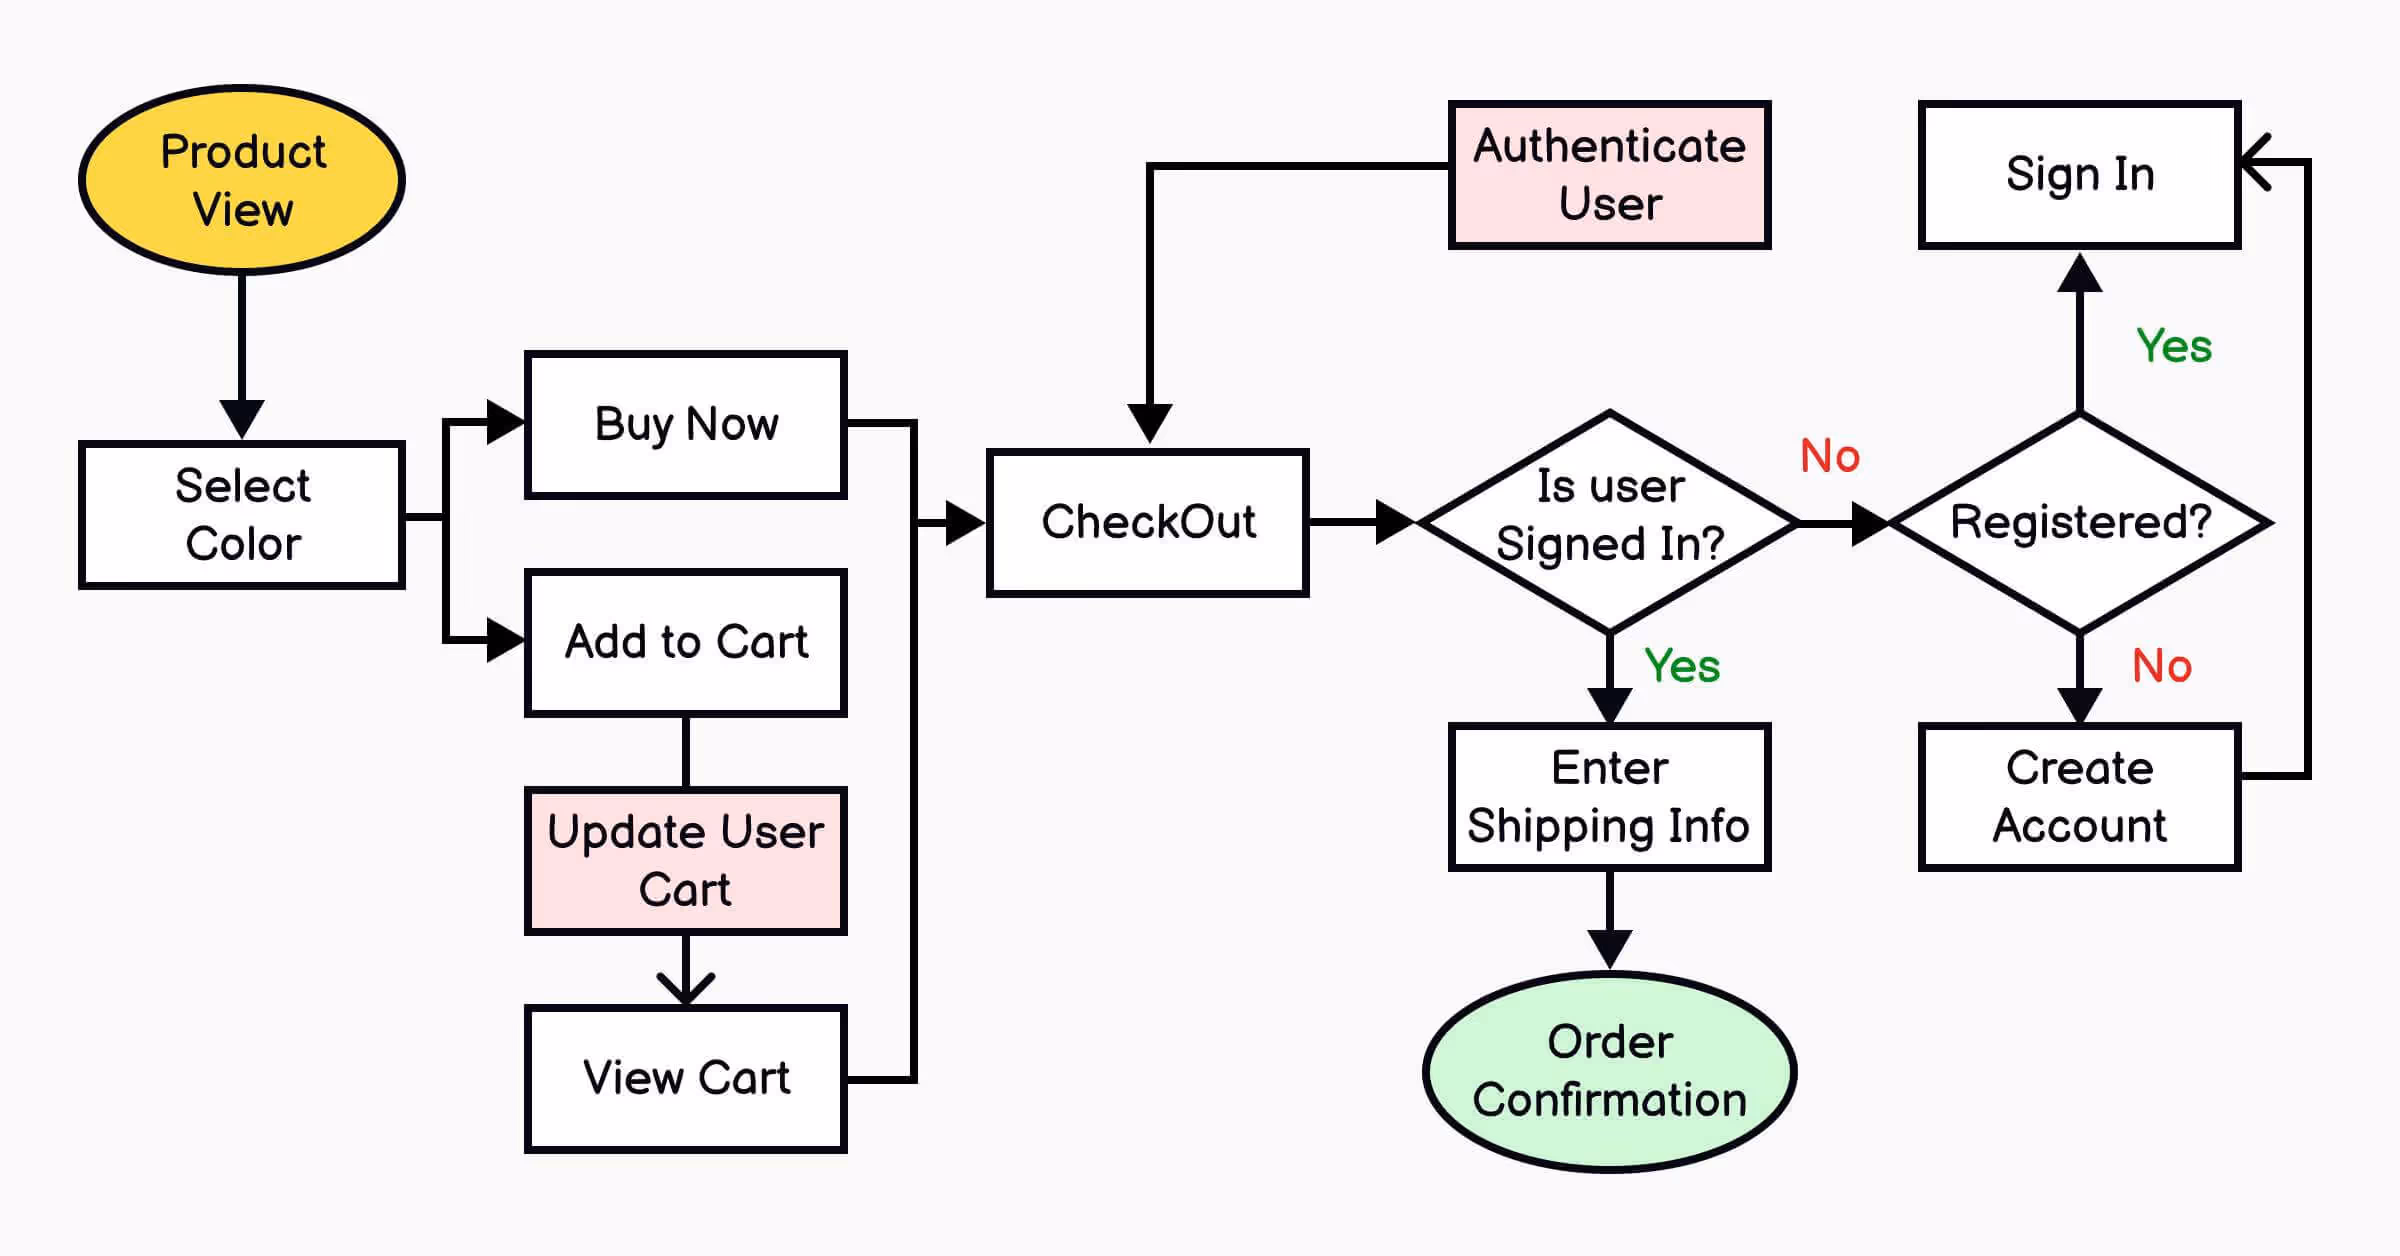
Step 7: Connect screens into wireflows
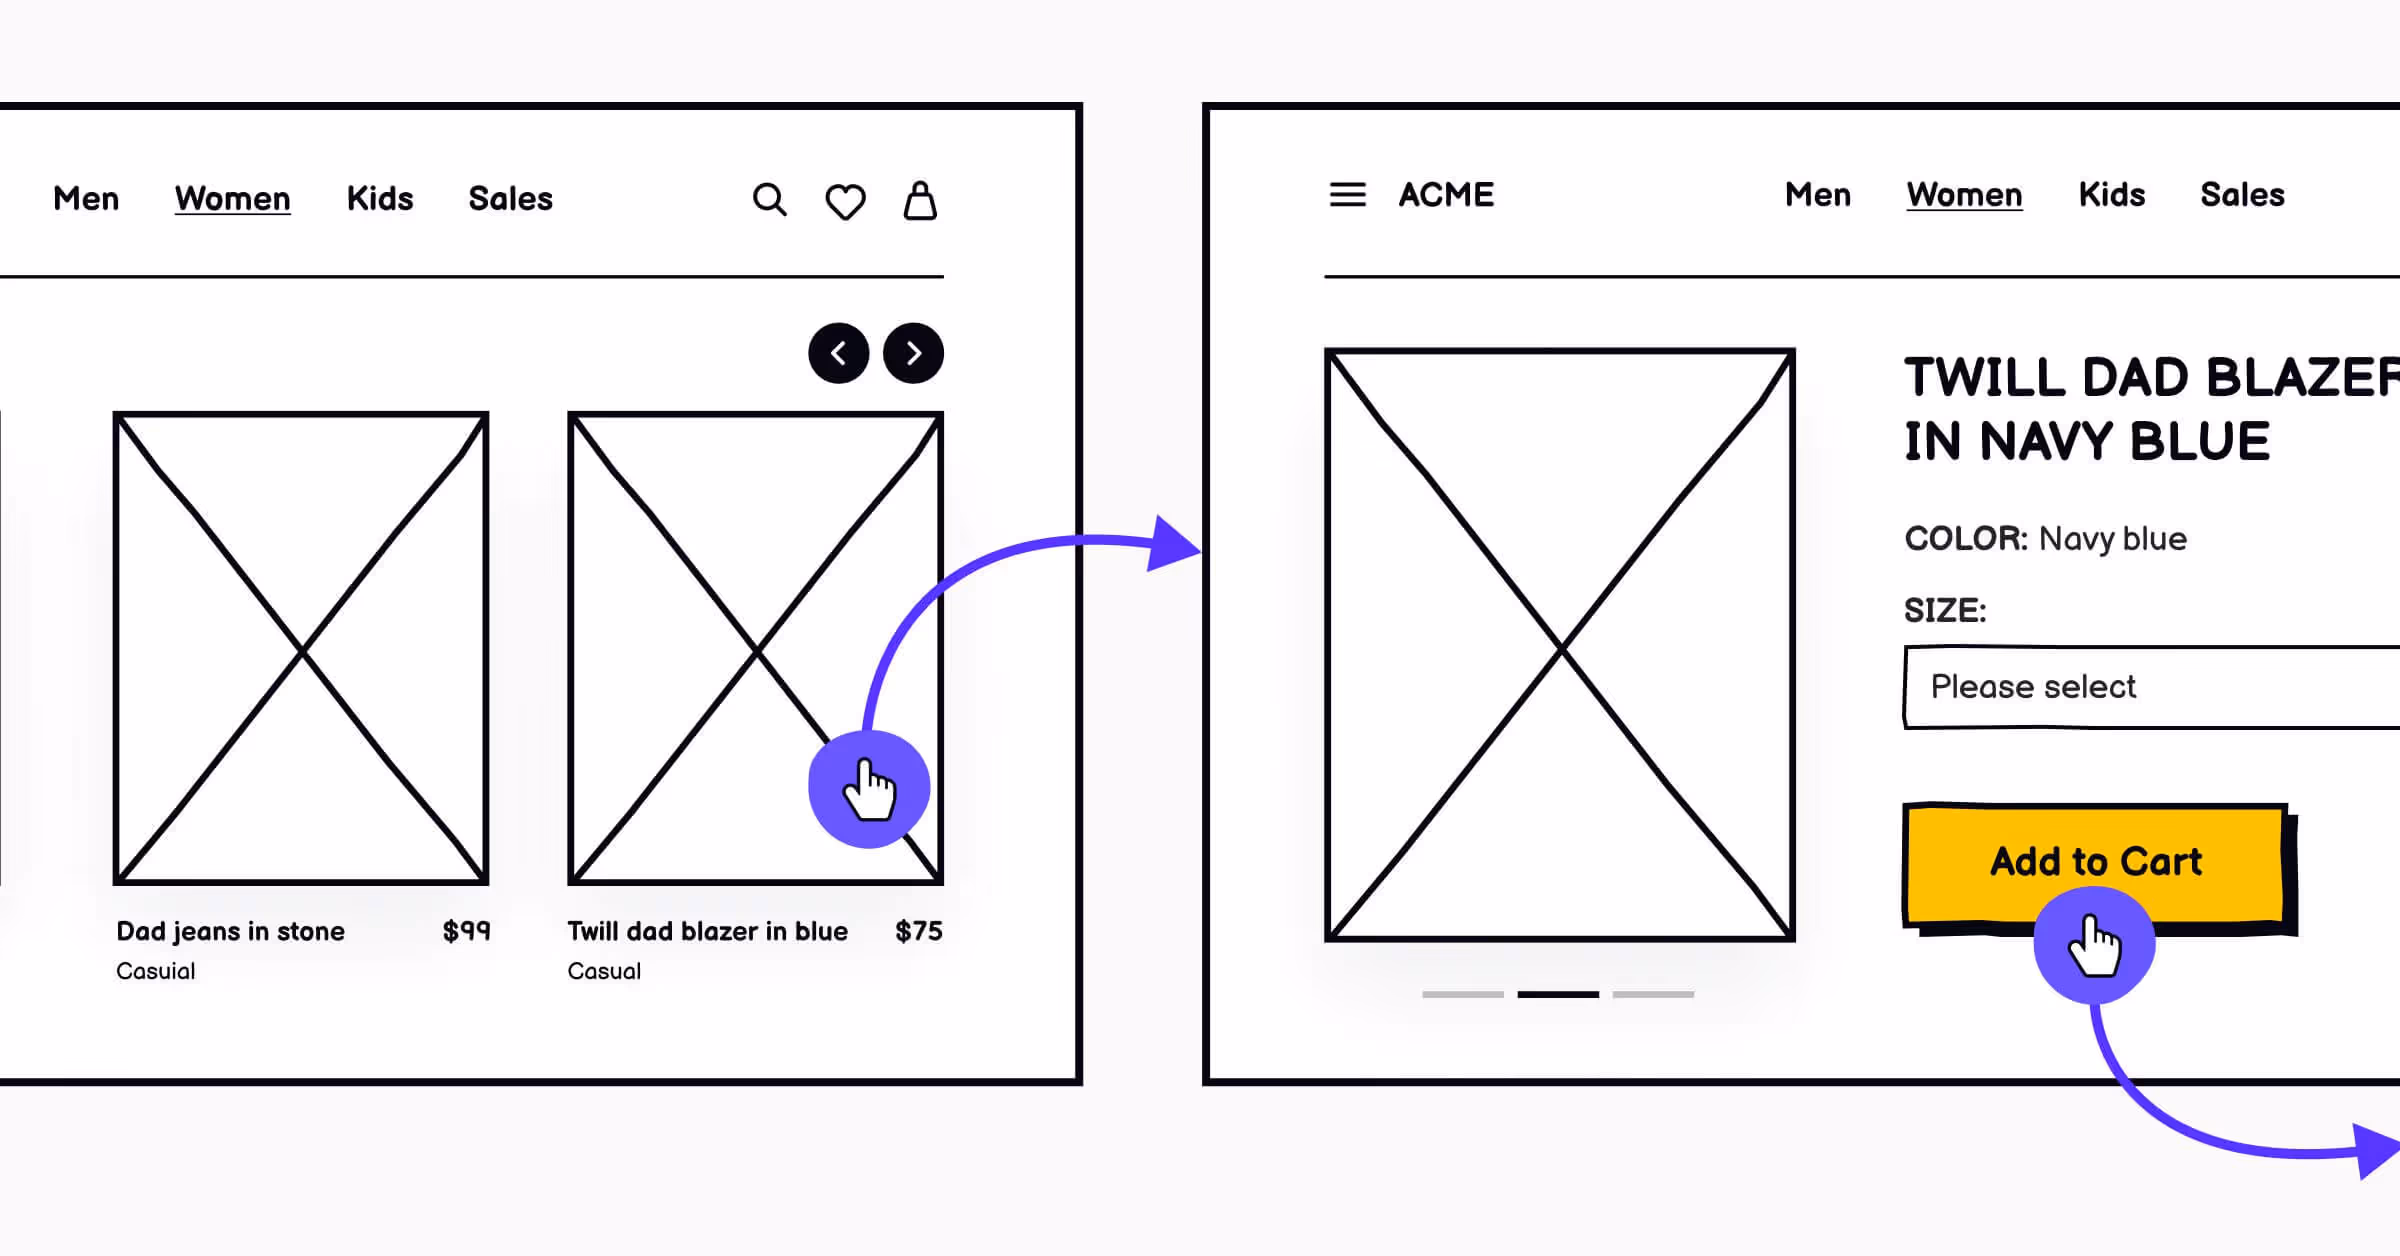
Once you've created screens, it's a wise idea to connect them to wireflows. According to the Nielsen Norman Group's definition, the term 'wireflow' comes from the combination of the words 'wireframe' and 'flowchart' and refers to diagrams illustrating user flows with wireframes. Wireflows can also contain annotations to indicate what happens in the back end at that time.
Wireflows help UX designers see and evaluate the product's functionality as a whole. They might help you notice that some steps are illogical or require too many clicks for users to complete a task.
Step 8: Present your wireframes to stakeholders
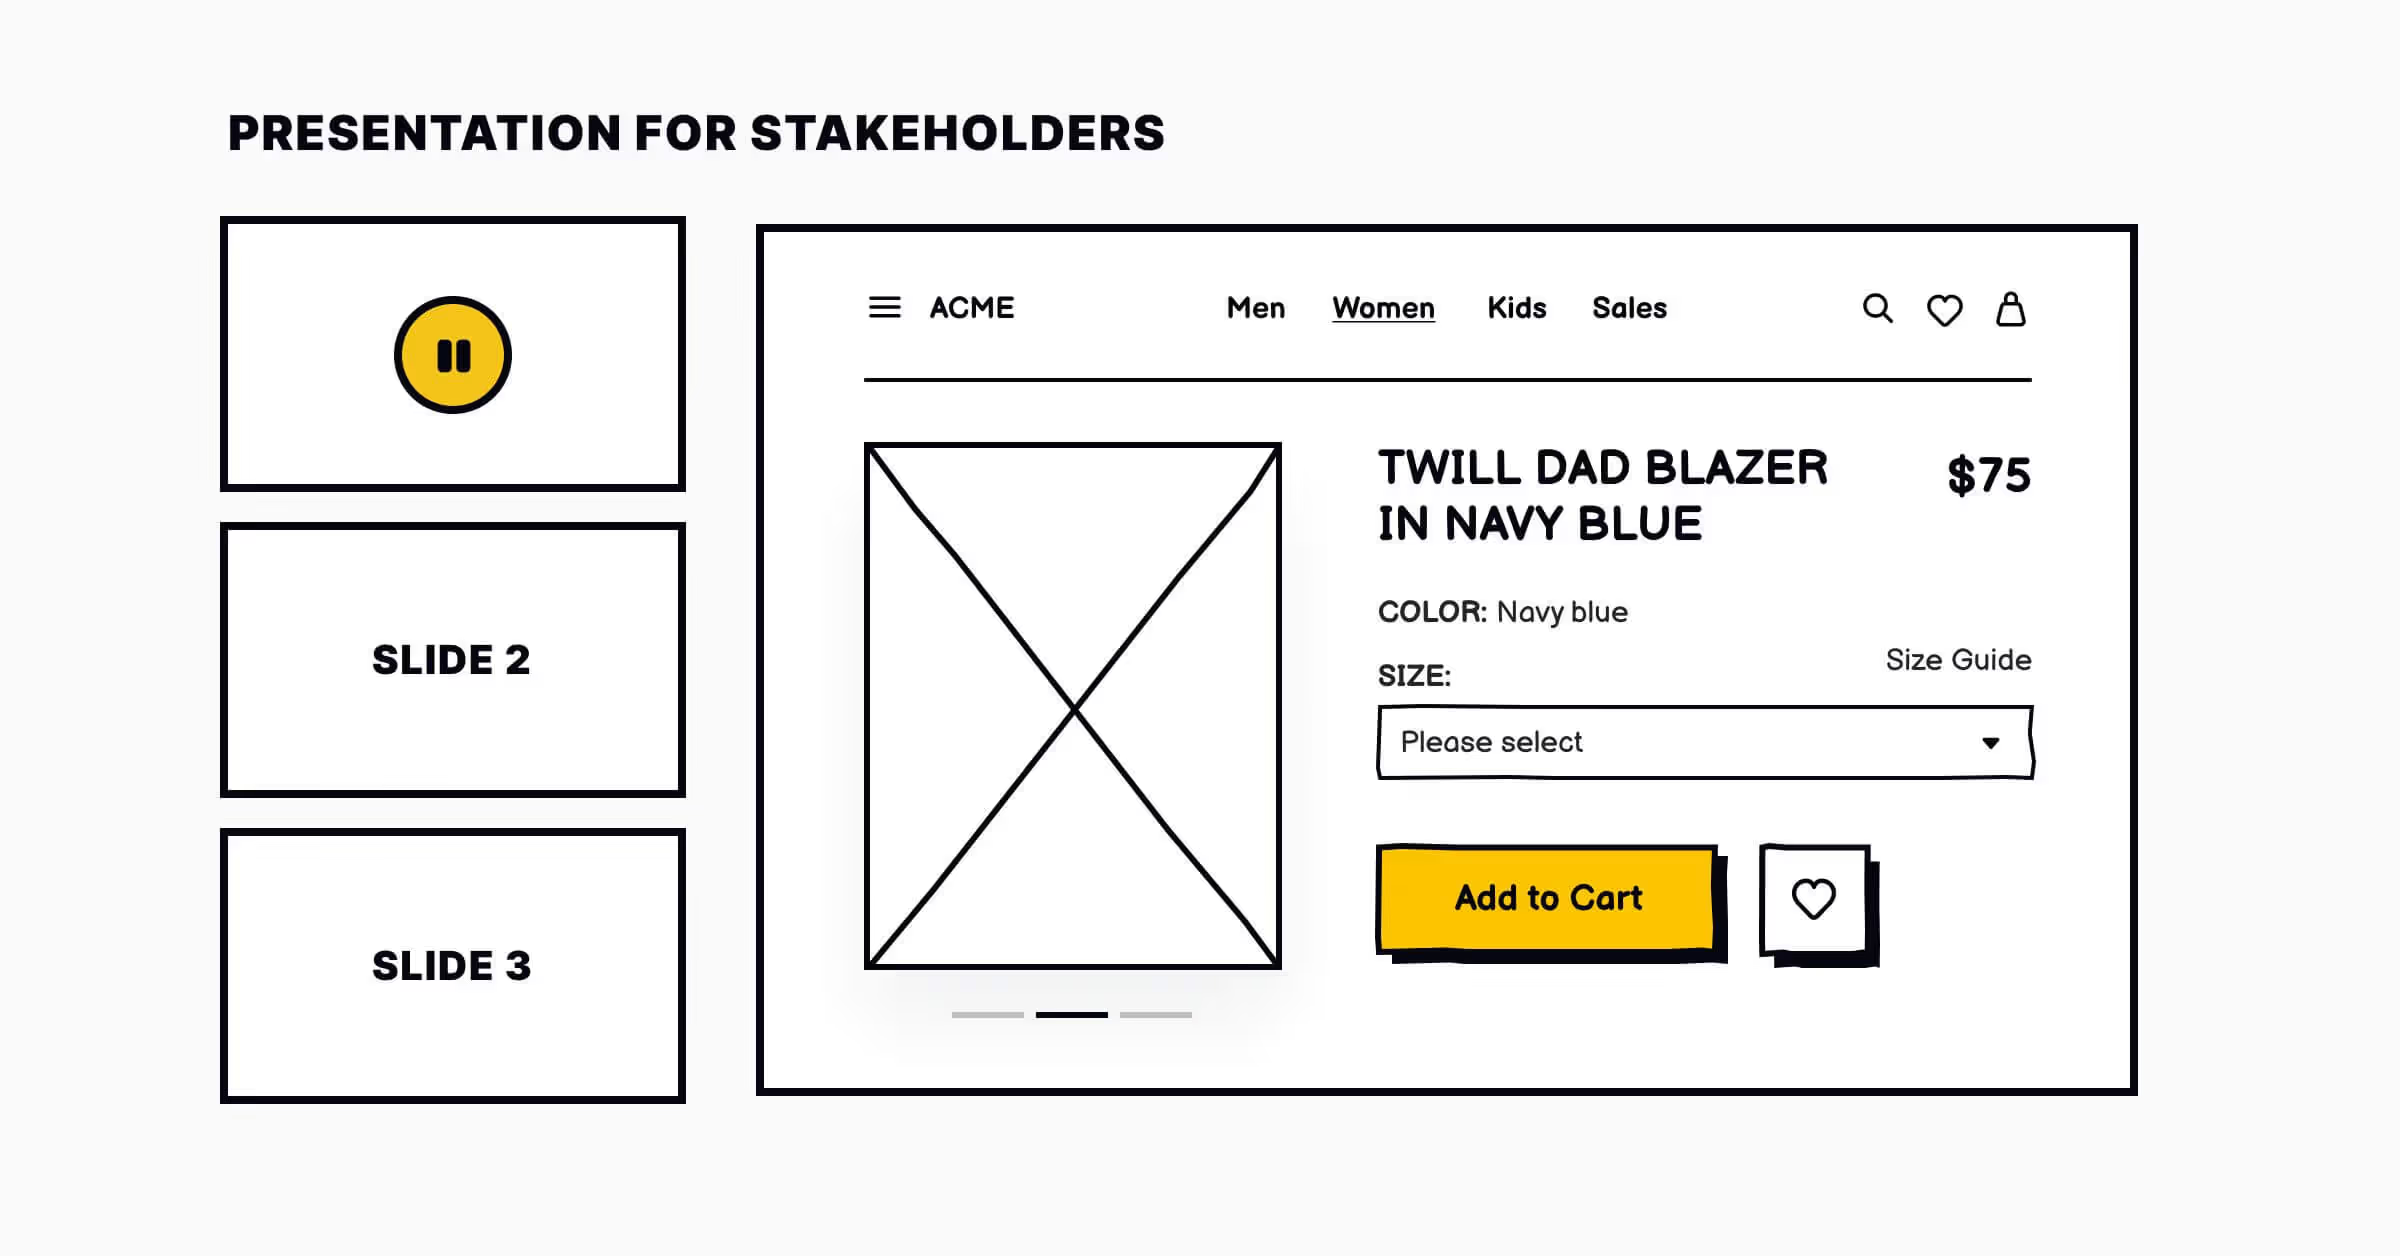
Bringing your ideas to stakeholders and gathering their feedback is the last step before you test wireframes with users. Bringing the team, executives, or clients into the developmental process has the following benefits:
- It provides clarity on the product direction for the whole team
- It ensures that business requirements are met
- It allows you to gain meaningful feedback, spot inconsistencies, and apply the last tweaks to your wireframes
Tools You Can Use to Create a Wireframe
While paper wireframes are suitable at the early stages of the product life cycle, you will need digital tools when presenting final versions of wireframes to stakeholders or getting more meaningful insights during user testing.
Your choice of tool will greatly depend on:
- Project size
- The number of people who will collaborate on wireframes
- Project needs
There are a variety of tools for wireframing, but the most popular include:
1. Balsamiq
Product type: Browser-based and desktop applications
Price: Subscription plans start at $9/month for a 2-project space
If you're not aiming at pixel accuracy and need a digital tool for outlining information architecture and layout, Balsamiq is a safe bet. It doesn't require specific skills and allows you to create your first wireframes within minutes.
2. Figma
Product type: Browser-based and desktop applications
Price: Offers a free plan with 3 projects and an unlimited number of collaborators
Figma is one of the most popular design tools. It allows the creation of low and mid-fidelity wireframes as well as interactive, clickable prototypes. However, you'll need some time to learn the ropes on Figma.
3. Miro
Product type: Browser-based application
Price: Offers a free plan with a single workspace and 3 editable boards
Miro is a virtual easy-to-use whiteboard that allows you to create wireframes, collect feedback on sticky notes, and iterate in one place. It has several built-in wireframe templates for websites and mobile applications that help you create low and mid-fidelity wireframes in minutes.
Want to Boost Your Wireframing Skills in Just 5 Minutes?
Uxcel's wireframing course will guide you through the most critical questions you might have as a designer when approaching the wireframe process:
- What is wireframing?
- How will wireframes benefit my project?
- How do I incorporate wireframes into the Agile process?
- How to create mobile wireframes?
- What are the best wireframing software programs?
- What are the best practices for wireframing?
- How to use wireframes in usability testing?
Get tips on incorporating wireframing into your product design process, saving resources, and designing a product that meets business and user needs.